Boot and Tow
Note: Boot/Tow is an optional module.

Boot and Tow TreeView
Boot Release Reason
Boot Release Reasons are used to document why a Boot was removed from a Vehicle.

Boot Release Reason Options
Sequence - Enter the sequence number. This decides where the entry will appear in dropdowns.
Code - Enter a Code for the Boot Release Reason. 15 character limit.
Description - Enter a description of the Boot Release Reason.
Type - Select what happens when the Boot Release Reason is used.
Tow - The Vehicle will be towed.
Close - The Boot will be removed and the owner may reclaim the Vehicle.
Inactive - Inactivates the Boot Release Reason.
Boot/Tow Comments
Boot/Tow Comments allow Officers to quickly note relevant information about a Boot/Tow.
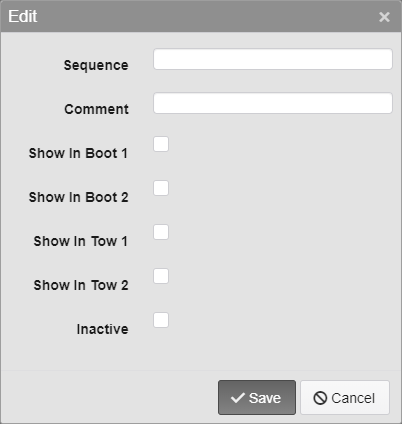
Boot/Tow Comments
Sequence - Enter the sequence number. This decides where the entry will appear in dropdowns.
Comment - Enter the Comment that can be made about the Boot/Tow.
Show in Boot 1 - This will make the Comment appear in the Boot 1 Comment section.
Show in Boot 2 - This will make the Comment appear in the Boot 2 Comment section.
Show in Tow 1 - This will make the Comment appear in the Tow 1 Comment section.
Show in Tow 2 - This will make the Comment appear in the Tow 2 Comment section.
Inactive - Inactivates the Boot/Tow Comment.
Boot/Tow Notice
Set up when and how Boot/Tow Notices are sent out. When the Notice is run, it will generate Boot/Tow records for eligible Vehicles and send the selected Template to the Persons attached to them.

Boot/Tow Name and Notice
Name - Enter the name of the Boot/Tow Notice.
Notice
Boot Eligible After Notice Created - This many days after the Notice is created, the Vehicle will be marked as Boot Eligible.
Tow Eligible After Notice Created - This many days after the Notice is created, the Vehicle will be marked as Tow Eligible.
Note: This number must be greater than the Boot Eligible number.
Template - Select the Template to be used when creating the Notice.
Search Criteria

Boot/Tow Search Criteria
Minimum Number of Tickets And/Or Minimum Ticket Amount Due - Enter the minimum number of Tickets and/or the minimum Ticket amount due for a Notice to be generated.
Exclude Ownerless Tickets - Select this checkbox to exclude Tickets that do not have a Person attached to them when running the Notice.
Include Only Tickets That Meet the Following Criteria:
Only Tickets Issued After - Only include Tickets issued after this date when running the Notice.
Number of Days Past Issue Date - Only include Tickets that are this many days past their Issue Date.
Number of Days Past Denial Date - Only include Tickets that are this many days past their Appeal Denied date.
Include tickets with the following status - Select Yes to only include Tickets with the status. Select No to not include Tickets with the status. Select Ignore if the status should not be used as part of the criteria.
On Appeal
Exported
On Hold
Payment Plan
Collection
Paid
Violations
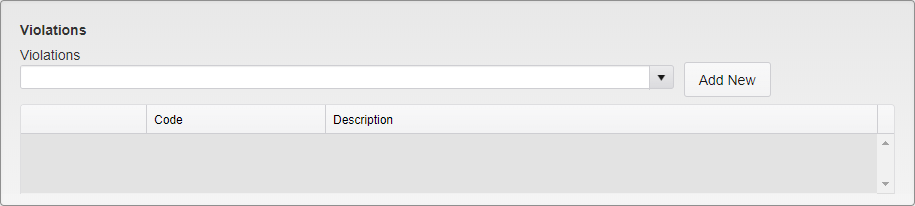
Boot/Tow Violations
Select the Violations that the Notice will apply to.
Delivery Options

Boot/Tow Delivery Options
Delivery Order - This is the order in which the letters are processed and emailed or printed. You may use the First Available address or Send to All addresses.
If you are printing letters you must also select which address to use as multiple addresses are possible.
Billing - Multiple billing addresses are possible, so you must also select Last Entered or Address Type.
Last Entered - This is the last or latest address in the system.
Address Type - Choose to send to a specific address type.
Choose the print order, by Last Name or by Zip Code.
Boot/Tow Reasons Codes
Boot/Tow Reasons Codes note the reason a Vehicle is marked to be Booted/Towed.

Boot/Tow Reasons Code Options
Sequence - Enter the sequence number. This decides where the entry will appear in dropdowns.
Code - Enter a Code for the Boot/Tow Reason. 15 character limit.
Description - Enter a description of the Boot/Tow Reason.
Boot - Check this box to allow this Reason Code to be selected for Boots.
Tow - Check this box to allow this Reason Code to be selected for Tows.
Inactive - Inactivates the Boot/Tow Reason Code.
Fields
Settings for the Fields that appear in the Boot/Tow module are found here.

Fields Options
Display Name - The name of the Field being edited. This cannot be changed.
Default Value - Enter the default value for the Field. This is the value that will appear in the field when the Insert key is pressed on the keyboard while in that field.
Mandatory - Check this box to require this Field when saving a new Permit.
Tab Stop Off - Check this box to skip this Field when pressing tab to move through the Fields.
Note: Custom Fields are set up under the general Boot/Tow settings.
General Settings

Boot/Tow General Settings
Enable Boot Signature Capture - Check this option to enable Signature Capture when Booting via the handheld.
Require Boot Signature Capture - Check this option to require a Signature when Booting via the handheld.
Enable Tow Signature Capture - Check this option to enable Signature Capture when Towing via the handheld.
Require Boot Tow Capture - Check this option to require a Signature when Towing via the handheld.
Next Boot Tow Number - Enter the next Boot/Tow Number to be used when adding new Boot/Tow records online. This number will be used when a batch of Boot/Tow records is generated via Notice and will automatically increment when it is used.
Note: This must be a number. Letters and other symbols cannot be included.
Add Fee When Car Is Booted - Select the Fee to add when a Vehicle is Booted.
Notification IDs - Enter the TickeTrak usernames to send a Notification to when a Boot is fully paid off.
Notification Emails - Enter the Emails to send a Notification to when a Boot is fully paid off.
Location
Locations are used to note specific lots and other designated parking locations.

Location Listing Sample
To add a new Location, click the Add button. To edit an existing Location, click the pencil icon next to the Location you wish to edit. To delete an existing Location, click the X icon next to the Location you wish to delete.
A Permit Lot is a parking lot that is designated for Permit use. A Timed Lot is a parking lot designated for timed use and may be enforced by meters, chalking, etc.
To create a Permit or Timed Lot, click the Click To Create button under the relevant header for the Location you wish to change.
Note: Once a Location has been made into a Permit or Timed Lot it cannot be undone.

Location Options
Sequence - Enter the Sequence number. This decides where on the dropdown the option will appear.
Code - Enter the Code for the Location. 10 character limit.
Description - Enter a description of the Location.
HHDisplay - Enter what the Location will be listed as on handheld displays.
Inactive - Inactivates the Location.
Note: The same Location fields are used in multiple places in TickeTrak, they are just listed multiple times in the settings.
Officers
Officers must be added here before they are able to log into the handheld.

Officers Options
Code - Enter the Code for the Officer. 10 character limit.
Last Name - Enter the Last Name of the Officer.
First Name - Enter the First Name of the Officer.
Password - Enter the Password the Officer will use to log into the handheld.
Security Level - Select the Officers Security Level.
1 - Officer - Officers can issue Tickets and see if their handhelds are downloading existing Ticket and Scoff information.
2 - Admin - Admins can change settings such as the Printer and Sync settings, as well as change Ticket numbers, in addition to everything Officers can do.
Inactive - Inactivates the Officer.
Tow Agency

Enter Tow Agencies to be used when Towing Vehicles.
Agency Code - Enter a Code for the Tow Agency. 15 character limit.
Agency Name - Enter the name of the Tow Agency.
Address1 and 2, City, State, Zip - Enter the Address information for the Tow Agency.
Phone - Enter the phone number of the Tow Agency.
Alt Phone - Enter an alternate phone number for the Tow Agency.
Inactive - Inactivates the Tow Agency.
Last Used - The last date the Tow Agency was used on. This will automatically update when the Tow Agency is marked as used for a Tow.
Tow Dispositions
Tow Dispositions are used to note what happened to a Vehicle after it has been Towed.

Tow Disposition Options
Sequence - Enter the Sequence number. This decides where on the dropdown the option will appear.
Code - Enter the Code for the Tow Disposition. 15 character limit.
Description - Enter a description of the Tow Disposition.
Inactive - Inactivates the Tow Disposition.
Vehicle Damage
Vehicle Damage is used to note damage made to the Vehicle when Towing.

Vehicle Damage Options
Sequence - Enter the Sequence number. This decides where on the dropdown the option will appear.
Code - Enter the Code for the Vehicle Damage. 15 character limit.
Description - Enter a description of the Vehicle Damage.
Inactive - Inactivates the Vehicle Damage.
Was this article helpful?
That’s Great!
Thank you for your feedback
Sorry! We couldn't be helpful
Thank you for your feedback
Feedback sent
We appreciate your effort and will try to fix the article