Personnel

Personnel TreeView
General Settings
Personnel are employees that can access TickTrak. Each must have their own account and must be sorted into a Group to use the software.

Personnel List
To add a new Personnel entry, click the Add button above the list of Personnel. To edit an existing entry, click the pencil icon next to the entry you wish to edit.
![]()
Personnel Action Bar
Click Add to bring up a blank Personnel form, then enter any information and click Find to perform a search of all existing Personnel. If multiple matches are found, use the arrow icons to move through them.

Personnel Action Menu
The Action menu contains a button to Unlock Accounts. If a user has used up all of their login attempts, an admin can use this feature to reset their login count.
To save a Personnel entry, click the Save button at the top right of the page.
Below is an explanation of each of the available fields in Personnel. Fields with an asterisk next to them are required when creating or editing Personnel. Once the Personnel has been saved, they must be added to a Group under Group Security before they can log in.

UserID/Password Options
Login ID - Enter a user name that the employee will use to log in. This cannot be changed after the Personnel entry is saved. 10 character limit.
Password - Enter a Password for the employee.
Confirm Password - Once a Password has been entered, this box will appear. Type the same Password a second time to confirm it.
Note: Changing the Password on existing Personnel will change their Password immediately. It is recommended that you check the Force Password Change box if this is done.
Agency - Select the Agency that the employee is a part of.
SSO ID - If using SSO, enter the employee’s SSO ID to connect the Personnel entry to their account.
Last Modified - This will automatically update to the current date when changes to the Personnel entry are saved.
Force Password Change - Checking this box will force the employee to change their password the next time they log in.

Personal Options
Last Name - Enter the employee’s Last Name.
First Name - Enter the employee’s First Name.
Note: Once the First and Last Name are entered, you can search for the Person in the database and load their existing information into the form.
Middle Name - Enter the employee's Middle Name if they have one.
Suffix Name - Enter the employee’s Suffix Name if they have one. (Ex, Sr. or Jr.)
DOB - Enter the employee’s Date of Birth.
Alternate ID - Enter the employee’s Alternate ID if your organization is using Alternate IDs.
Driver’s License - Enter the employee’s Driver’s License number.
Cash Drawer ID - Select the Cash Drawer ID that the employee will be associated with.
Address - Enter the employee’s address. Clicking Add will cause empty fields to appear under each header in the Address form.

Address Entry
Enter the Address in the form in the relevant fields. Be sure to scroll to the right to see all of the fields.
Click on the check mark to save the Address. Click on the no sign (the circle with a slash through it) to delete the entry.
Click on the Service bar to open the Service entry box. These settings are not frequently used and can be left blank.

Service Options
Hire Date - Enter the date the employee was hired.
Inactive Date - Enter the date the employee went inactive, if relevant.
Reason for Dismissal - Enter the reason an employee was dismissed, if relevant.
Current Rank - Enter the employee’s current rank, if relevant.
Licensed Date - Enter the date an employee was licensed, if relevant.
Badge# - Enter the employee’s badge number, if relevant.
Current Title - Enter the employee’s current title.
Last Promotion - Enter the date of the employee’s last promotion.
Certification Level - Enter the employee’s certification level, if relevant.
Next Evaluation - Enter the date of the employee’s next evaluation, if relevant.
Degrees - Enter the degrees the employee holds, if relevant.
Years Completed - Enter the number of years completed towards the employee’s degree, if relevant.
Points Accumulated - If using a points system, enter the number of points the employee has accumulated.
Languages - Enter the languages the employee speaks.
Time in Service Years and Time in Service Months - These are both automatically calculated based on the employee’s hire date.
Click on the Emergency bar to open the Emergency entry box. These settings are not frequently used and can be left blank.

Emergency Options
Contact Name - Enter the name of the employee’s emergency contact.
Contact Address 1 and 2, City, State, Zip - Enter the emergency contact’s full address into the relevant fields.
Home Phone - Enter the emergency contact’s home phone number.
Business Phone - Enter the emergency contact’s business phone number.
Relation - Enter what the emergency contact is to the employee. (Ex, mother, grandfather, spouse, etc)
Blood Type - Select the employee’s blood type.
Medical Alert ID 1 and 2 - Enter the employee’s Medical Alert IDs, if relevant.
Blood Type
Blood Type is used in the Emergency Information section of Personnel.

Blood Type Options
Code - Enter the Code for the Blood Type. 15 character limit.
Description - Enter a description of the Blood Type.
Inactive - Inactivates the Blood Type.
Cash Drawer ID
Cash Drawer ID is used to determine which Cash Drawer is being used. The ID can be attached to Personnel directly, or they can select the Cash Drawer being used when they set up for the day.

Cash Drawer Options
Code - Enter the Code for the Cash Drawer. 15 character limit.
Description - Enter a description of the Cash Drawer.
Inactive - Inactivates the Cash Drawer.
Division
Division is used to make the department than an employee entered into Personnel is a part of.

Division Options
Code - Enter the Code for the Division. 12 character limit.
Description - Enter a description of the Division.
Inactive - Inactivates the Division.
Fields
Settings for the Fields that appear in the Personnel editor are found here.

Fields Options
Display Name - The name of the Field being edited. This cannot be changed.
Default Value - Enter the default value for the Field. This is the value that will appear in the field when the Insert key is pressed on the keyboard while in that field.
Mandatory - Check this box to require this Field when saving a new Permit.
Tab Stop Off - Check this box to skip this Field when pressing tab to move through the Fields.
States
The State dropdown is used to define the State section of an address or the registration of a Vehicle. It can be arranged so that the most commonly used States are at the top of the list.
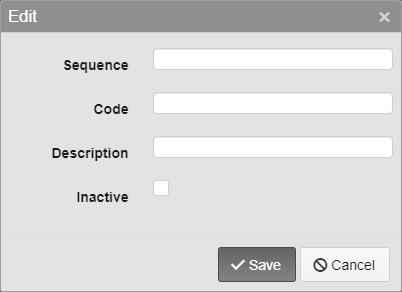
State Entry Options
Sequence - Enter the Sequence number. This decides where on the dropdown the option will appear.
Code - Enter the Code for the State. 2 character limit.
Description - Enter a description of the State.
Inactive - Inactivates the State.
Note: The same State fields are used in multiple places in TickeTrak, they are just listed multiple times in the settings.
Was this article helpful?
That’s Great!
Thank you for your feedback
Sorry! We couldn't be helpful
Thank you for your feedback
Feedback sent
We appreciate your effort and will try to fix the article