Web Portal

Web Portal TreeView
There are several design options available for your customer facing Web Portal. You may choose bar height and colors and we will add your logo. There are other choices that are set up in the application like the verbiage on each page, if attachments are allowed, and some pages have an option for the Web Portal user to check to acknowledge user defined terms and conditions.
We will need your:
Bar color codes.
Short or tall bar desire.
Copy of your logo in a PNG format.
Tall Bar Example

Short Bar Example
General Settings
General Settings for Web Portal payments can be found here.

Web Portal - General Settings
Do not allow payments using credit - Checking this option prevents Web Portal users from applying account credit to their purchases. Credit is enabled by default.
Disable TickeTrak account creation - Checking this option removes the Account Creation page from the Web Portal and prevents new accounts from being created. This is commonly used for SSO set ups to prevent users from adding new records and causing cross contamination.
Do not allow use of coupon code - Checking this option removes the Coupon Code entry field from the Web Poral Cart page. The field is visible by default, even if there are no Coupon Codes set up in the system.
Design Pages
Web Portal - Design Pages TreeView
Entering Text

Formatting Tools
Text may be typed into fields and any of the available formatting tools can be used.
![]()
HTML View Icon
This icon can be used to view the HTML.
Images can be added by dragging and dropping them into the desired area.
Global Header/Footer
Make This Header Global For All Pages - Check this if you want to use the same header on all pages.
Global Footer Used For All Pages - This is the footer that will be used on all pages.

Header and Footer Design Fields
Account Creation
This is the page that displays when the link to create an account is clicked by a user of the portal.
Account Creation Page Editor
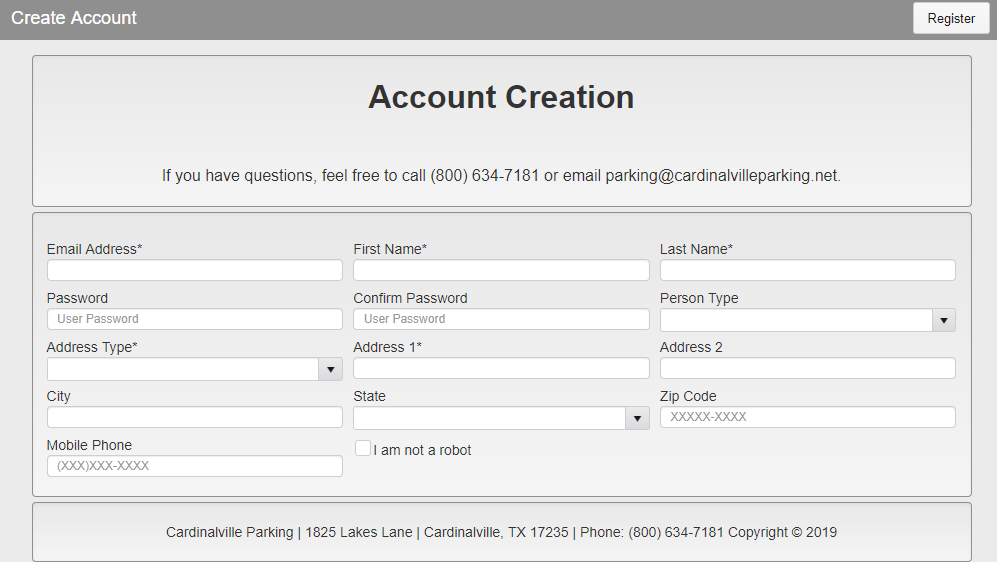
Account Creation Page Sample
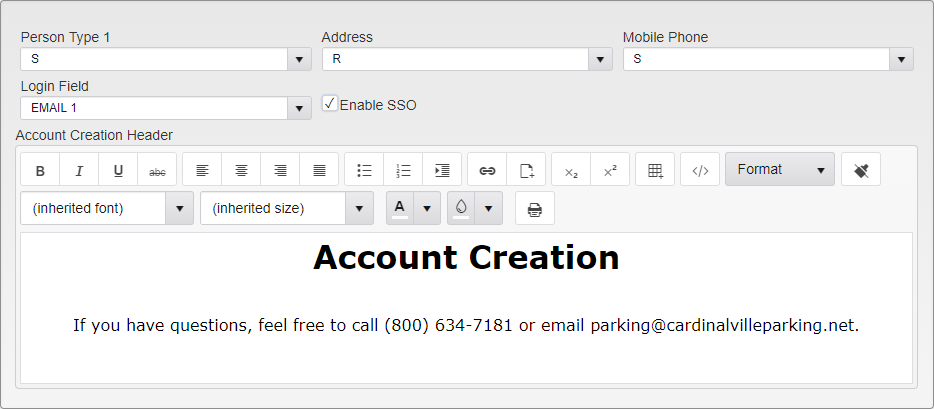
Choose if you want the following data entry fields to Show (S), be Hidden (H), or be Required (R) on the Web Portal:
Person Type 1
Address (Including City, State, and ZIP)
Mobile Phone
If you are using SSO (Single Sign-On):
Login Field - Choose the field from the dropdown list that will be used to verify users.
Enable SSO - Check this box if using SSO.
Appeal
Note: Online Ticket Appeals is an optional feature.
This page displays when Appeal Ticket is clicked on the Web Portal.
Require Agreement - Select this if you want the appellants to agree to terms when a Ticket is appealed. Enter the desired text below that will be displayed to the end user.

Appeal Agreement Editor

Appeal Agreement Sample
E-Commerce
This is the page that displays when a user goes to check out and pay for their Tickets and Permits.

E-Commerce Page Editor
Landing
This is the page that displays after a user is logged in to the Web Portal.

Landing Page Editor

Landing Page Sample
Login
This is the page end users reach when accessing the Web Portal.
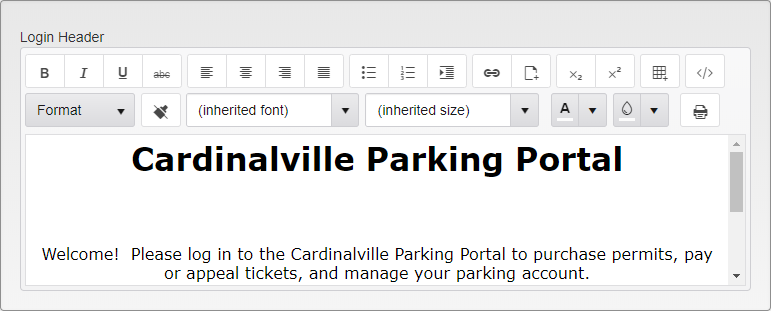
Login Page Editor

Login Page Sample
Permit
Note: Online Permit Sales is an optional feature.
This is the page used to purchase Permits.
Require Agreement - Select this if you want the appellants to agree to terms when a Permit is sold and enter the desired text below.

Permit Page Editor

Permit Page Sample
Permit - View Active
View Active Permits Design Page Sample
This controls the text found on the Permit Management page on the Web Portal. This text appears at the top of the page, above the Permits attached to the account.
Permit - Change Vehicle
Change Vehicle Design Page Sample
This controls the text found on the Change Vehicle page. The text in the upper box appears at the top of the page, above the Permit and Vehicle information.
The “Require Agreement” checkbox activates an agreement checkbox on the Change Vehicle page. This checkbox appears at the bottom of the page, and the text in the lower box appears directly above it.
Receipt
This is the receipt that displays after a payment is made.

Receipt Page Editor
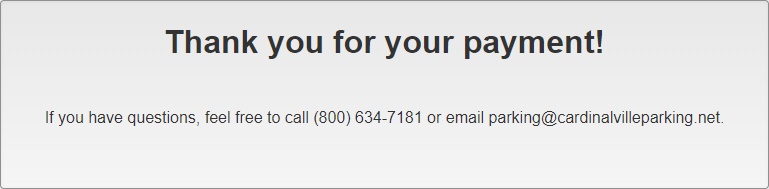
Receipt Page Sample
Shopping Cart
When a user clicks on the cart to pay this is the page that displays.
Require Agreement - Select this if you want the users to agree to terms when a payment is made and enter the desired text below.

Shopping Cart Editor
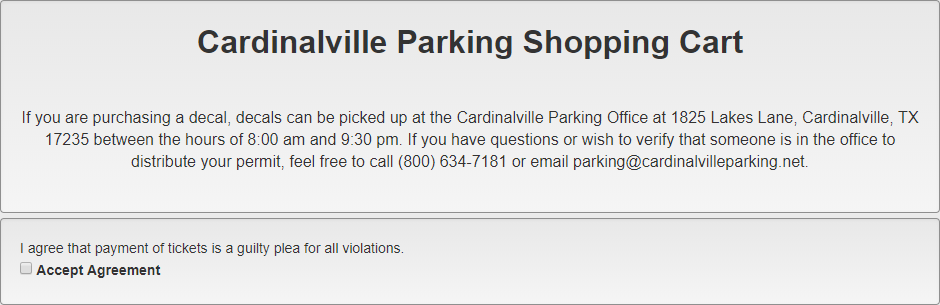
Shopping Cart Sample
Ticket
Note: Online Ticket Payments is an optional feature.
This is the page that displays when Ticket is selected.

Ticker Page Editor
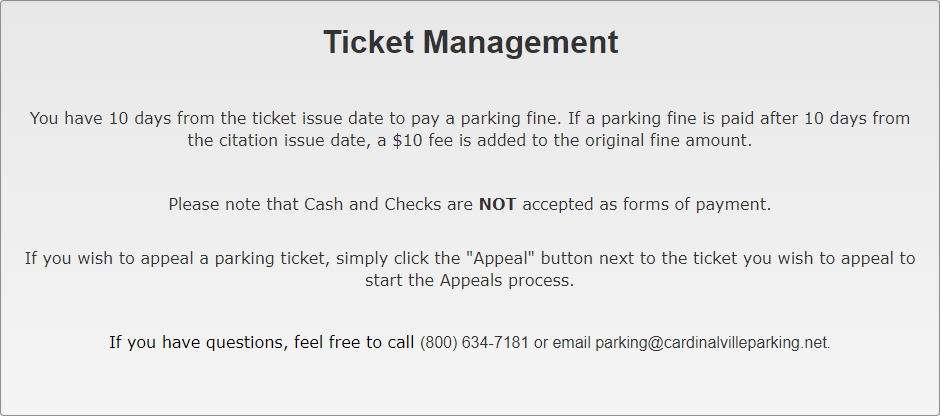
Ticket Page Sample
E-Commerce Settings
E-Commerce Providers - Select the E-Commerce provider you will be using.
Currently, the following providers are supported:
CashNet Hosted
Chase Hosted
CyberSource Hosted
Evalon Hosted
Official Payment
OpenEdge
- Paya Hosted
Payeezy Hosted
TouchNet Hosted
TrustCommerce Hosted
USAePay Hosted

E-Commerce Settings
Different providers will require different information. These settings will be set up when your account is set up.
Permit Settings
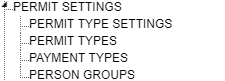
Web Portal - Permit Settings TreeView
Global Permit Settings

Global Permit Settings
Limit Permits Allowed And Payment Types Per Person Group - Select this to use Person Group settings to determine the Permits and Payment Types a Person is allowed to use. Selecting this setting will deactivate Limit Number Of Active Permits by Vehicle if that box is checked.
Limit Number Of Active Permits by Vehicle - Select this to limit the number of active Permits a Person can have by the number of Vehicles they are associated with. Enter the Max Per Vehicle in the text box. Selecting this setting will deactivate Limit Permits Allowed And Payment Types Per Person Group if that box is checked.
Require Tickets To Be Paid Prior To Permit Purchase - Select this to require all Tickets associated with a Person to be paid before allowing them to purchase a Permit. This setting is only active if Limit Permits Allowed And Payment Types Per Person Group is not checked.
Do not allow users to add addresses - Select this to prevent users from adding addresses to their accounts. This is most commonly used when address type has a direct impact on which Permits can be bought and which Payment Types can be used. This setting is only active if Limit Permits Allowed And Payment Types Per Person Group is not checked.
Allow web portal users to change vehicles assigned to a Permit - Select this to allow Web Portal users to change the Vehicles attached to their Permits via the Web Portal. This setting is only active if Limit Permits Allowed And Payment Types Per Person Group is not checked.
Only allow Numbers and Letters to be entered in license plate - Select this to only allow numbers and letters in the License Plate field on the Web Portal. This prevents entry of spaces, dash, and special characters.
Online Validation Request Notification - Select this to receive notifications when someone purchases a Permit that requires validation via the Web Portal. Login IDs listed will receive a notification within TickeTrak, and Notification Emails listed will receive an e-mail for each requested Permit.
Permit Type Settings
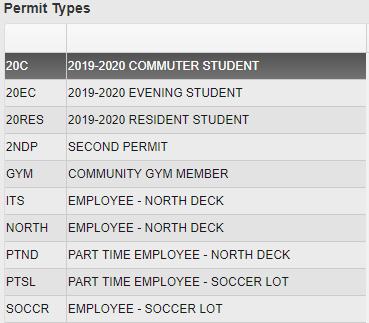
Permit Type Samples
To edit the Permit Type settings, you must first enter Permit Types under the Permits heading in the System Settings.
Click on the Permit Type you wish to edit. The background will be highlighted. Existing settings will be filled in in the boxes to the right.
Permit Options

Permit Options
Require Validation - Select this option to require Permits of this type to be validated by hand. When a Permit of this type is requested, it will appear on the Online Permit Validation list under Utilities.
Prefix/Suffix - Only available when Require Validation is not checked. Enter the Prefix or Suffix that will be attached to the automatically generated Permit number.
Starting Number - Enter the starting number for new Permits of this type.
Ending Number - Enter the ending number for Permits of this type.
Require Vehicle - Select this option to require a Vehicle be attached to this Permit type. Users will be required to enter and select a Vehicle for the Permit before being allowed to purchase it.
Number Of Days Active Permits May Overlap - Enter the number of days a Person may have overlapping active Permits. This allows the Person to obtain a new Permit before their current one expires.
Available Start and End Date - Enter the first and last dates on which the Permit type can be purchased.
WaitList Start and End Date - Enter the first and last day on which someone can be added to the WaitList for this Permit Type.
Note: These options are only available on Permit Types that have WaitList enabled.
Delivery Options
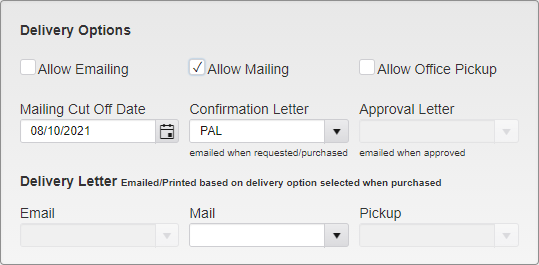
Delivery Options
Allow Emailing - Only available when Require Validation is not checked. Select this option to all users to choose to have the Permit Emailed to them to then print out on their own.
Allow Mailing - Select this option to allow users to choose to have the Permit mailed to them.
Allow Office Pickup - Select this option to allow users to choose to pick up the Permit in person at the office.
Mailing Cut Off Date - Enter the last day Permits will be mailed out.
Confirmation Letter - Select the Letter that will be e-mailed to the Web Portal user when a Permit has been requested or purchased, regardless of their chosen delivery method.
Approval Letter - Select the Letter that will be e-mailed to the Web Portal user when their Permit has been approved. This option is only available if Require Validation is checked.
Delivery Letter - Select the Letter to be used when a Permit has been purchased. Email, Mail, and Pickup can each have a different template Letter. The options for each are only available if the corresponding Delivery Option is checked.
Attachments

Attachments
Require Attachments - Select this option to require that users include Attachments when requesting this Permit type. Users can upload the following file types: .jpg, .jpeg, .png, .gif, .pdf, .doc, .docx, .xls, .xlsx, .rtf, .txt, .mp4, .mp3, .avi, .mov, .mpg, .ppt. Uploads can be up to 4 MB in size.
Enter text indicating the type of Attachments the user needs to include. This can include proof of address, proof of Vehicle ownership, or images of the Vehicle.
Permit Types
Enter Permit Types available for purchase.
Please see the Permit section for details.
Payment Types
Enter Payment Types available for use.
Please see the Payment Types section for details.
Person Groups
Person Groups can be set up to allow People with specific criteria to purchase specific Permits and use specific Payment Types. These criteria include Person types, Addresses Type, and up to 5 User Defined fields.

Person Group Samples
To add a new Person Group, click the Add button.

Person Group Settings - Part 1
Person Group Code - Enter a Code for the Person Group.
Note: This Code cannot be changed once the Group is saved.
Person Group Description - Enter a description for the Person Group.
Group Inactive - Inactivates the Group.
Do not allow users to add addresses - Prevents users in this Person Group from adding new Addresses to their account via the Web Portal.
Require Tickets To Be Paid Prior To Permit Purchase - Requires that users in this Person Group pay off all outstanding Tickets associated with their account before purchasing a Permit.
Limit Active Permits By - Select how to limit he total number of active Permits a single Person in this Group can have. By Vehicle, by Person, or by Both. The corresponding Max Per box will become active when you make your selection.
Selecting by Vehicle will allow the users to have that many active Permits on each Vehicle they are associated with, but will not limit the total number they have purchase overall.
Selecting by Person will allow users to have that many active Permits attached to their account, regardless of which Vehicles they are attached to.
Selecting by Both will set an upper limit to the number of active Permits a single user can have attached to their account, and also limit how many of them gave be on a given Vehicle.
For example, if Both is selected and the Max Per Person is 5 and the Max Per Vehicle is 2, that Person will be able to buy up to 5 Permits at one time, but only two of them can be attached to any given Vehicle.

Person Group Settings - Part 2
The Person Type 1, Person Type 2, Address Type, and User Defined options determine which Person records are in the Person Group. A given Person can have one Person Type 1, one Person Type 2, one entry per User Defined field, and an unlimited number of Addresses and Address Types in the system.
Selecting more than one option in these sections will include users with any of the selected items in that section. To be included, the Person must have at least one of the selected options in each section.
These sections can also be set as Ignore or Blank. Ignore means that the field will be ignored when checking for the Person Group. It does not matter what is in the field. Blank means that the field must not have any information in it to be counted.

Person Group Permit Type Selection
The Permit Type selections determine which Permits users in the Group have access to. All Permits start in the Permit Types Not Allowed section. Click on one to highlight it, and then click Allow Permit(s) to add it to the Permit Types Allowed list. Clicking on a Permit Type in the Allowed list and then Remove Permit(s) removes it from the list.
To select multiple Permit Types at once, you can hold down the Ctrl key on your keyboard and click multiple entries. They will all be highlighted. Clicking a highlighted entry with the ctrl key still held down removes the selection. You can also hold down the Shift key and click two Permit Types. This will select those two Permits and all of the Permit Types in between them on the list.
The Permit Type Purchase Settings for Group section only becomes active after the Group is saved. When the Group has been saved, click on the Add button in this section to set up the Purchase Settings for individual Permits. If nothing is set up in this section for a given Permit, it will default to the general settings found under Permit Type Settings.

Person Group Permit Purchase Settings
Select which Permit Types will be controlled by this Purchase Settings section. Each Permit Type may only be in one Purchase Settings per Group, and you will be warned upon saving if you have selected a Permit Type that already has Purchase Settings.
Max Active is the number of the selected Permit Types that can be active at one time for users in the Group. Max Vehicles is the number of Permits a single Vehicle can have.
The overall Group settings still apply, and the smaller number wins. If the overall Group allows for 3 active Permits at the same time and a Purchase Settings section allows for 5, they will still only be allowed 3 active Permits at one time.
Max Purchasable controls the number of Permits that can be purchased within a given time frame. This can be set to either be within a number of days or within a specific date range.
Online Availability Settings controls when the Permits will be available for purchase or WaitList via the Web Portal. The “Use dates from the Permit Type Settings” option is checked by default. Uncheck it and select the new Avalaible or WaitList Start and End Dates to give the Group earlier or later access to the Permits.
The Required Purchase section lets you select other Permits that must be purchased before those selected for the Purchase Settings can be obtained. Leaving this section blank will allow the Permits to be purchased at any time they are available without restriction by other Permit Types.
Select the Permit Types that are required for Purchase before the overall types for the section are available. Then, select the number of Permits that must be purchased. This can be In Total across all of the restricting Types or for each Type.
Finally, select how recently the restricting Permits must have been purchased for them to count for unlocking the overall Permits in the section. Leaving this number as 0 means the Permits can have been bought at any point in the past. You can also require that the restricting Permits not be expired for them to count.

Payment Types Allowed
The Payment Types Allowed section determines which Payment Types users in the group have access to. The information shown in the listing must be changed in the Payment Type settings and is only shown for reference when selecting the Payment Types. Check the box on the left on the Payment Type to select it.
Reset Portal Cache
Click on this link to reset the Portal Cache. A confirmation will pop up after the link is clicked.

Portal Cache Reset Successful
Resetting the Portal Cache forces all updates made to the Web Portal via System Settings to be published to the online Web Portal.
Ticket and Appeal Settings

Web Portal - Ticket and Appeal Settings TreeView
Ticket/Appeal Settings
Ticket Settings

Ticket Settings
Allow Payment Of Exported Tickets - Check this box to allow Persons to pay for Tickets even if they have been exported to another system.
Allow Payment Of On Appeal Tickets - Check this box to allow Persons to pay for Tickets even if they are on Appeal.
Allow Payment Of Collection Tickets - Check this box to allow Persons to pay for Tickets even if they have been sent to Collections.
Allow Visitors To Pay Tickets - Check this box to allow Persons without an account to pay for Tickets.
Show Ticket Images - Check this box to allow Persons to see images that were uploaded with a Ticket when they go to pay for the Ticket online.
Require All Values For Ticket Search - Check this box to require the Ticker Number and the connected License Plate and State all be used when searching for a Ticket on the Web Portal.
Allow Payments Of Tickets On Hold - Check this box to allow Held Tickets to be paid on the Web Portal.
Appeal Settings
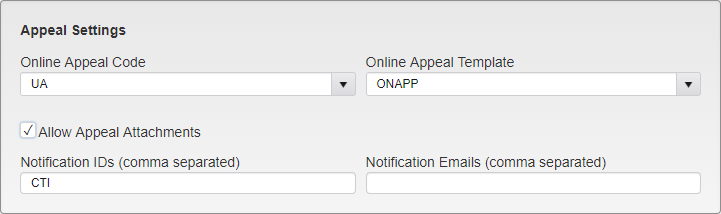
Appeal Settings
Online Appeal Code - Select the Appeal Code that will be applied to Appeals made online.
Online Appeal Template - Select the Template that will be used when a Person Appeals a Ticket online.
Allow Appeal Attachments - Select this option to allow Persons to upload attachments when submitting an Appeal. Users can upload the following file types: .jpg, .jpeg, .png, .gif, .pdf, .doc, .docx, .xls, .xlsx, .rtf, .txt, .mp4, .mp3, .avi, .mov, .mpg, .ppt. Uploads can be up to 4 MB in size.
Notification IDs - Enter the TickeTrak usernames to send a Notification to when a new Appeal is submitted.
Notification Emails - Enter the Emails to send a Notification to when a new Appeal is submitted.
Vehicle Linking Rules
When a user adds a Vehicle to their account via the Web Portal, it is compared to the Vehicles all ready in the system. How the system handles the new and any potential matching Vehicles depends on your settings.
Vehicle Exists | Vehicle Has Owner | Vehicle Has Tickets | “Tickets Must Be Paid” is Active | Outcome |
Yes | Yes | Yes | Yes | User receives a message that the Vehicle is already in system and they need to contact the office |
Yes | Yes | No | Yes | New Vehicle is created and the Person is added as the Owner |
Yes | No | Yes | Yes | User is linked to the existing Vehicle and Tickets and receives a message that there are Tickets. User is sent to the Ticket tab. |
Yes | No | No | Yes | User is linked to existing Vehicle |
Yes | Yes | Yes | No | New Vehicle is created and the Person is added as the Owner |
Yes | Yes | No | No | New Vehicle is created and the Person is added as the Owner |
Yes | No | Yes | No | User is linked to existing Vehicle |
Yes | No | No | No | User is linked to existing Vehicle |
No | N/A | N/A | N/A | New Vehicle is created and the Person is added as the Owner |
If you are using License Type in your system, it will always create a new Vehicle and add the new person as a Secondary driver, with no Owner selected.
Payment Types
Enter Payment Types available for use.
Please see the Payment Types section for details.
Violation
Enter Violations available for use.
Please see the Violation section for details.
Was this article helpful?
That’s Great!
Thank you for your feedback
Sorry! We couldn't be helpful
Thank you for your feedback
Feedback sent
We appreciate your effort and will try to fix the article