Permit Utilities
Batch Permits
The Batch Permit utility is used to generate multiple Permits at once without having to attach them to a specific Person.

Batch Permit Number Options
Enter the Prefix or Suffix to be used for the Batch. This will be appended to the beginning or end of the number for all of the Permits generated.
Enter the Starting and Ending Number for the Permits. The utility will create a Permit for each number in the range, including the start and end numbers.
The Batch Number is automatically generated when the batch is processed.
If desired, the Event Name of the event the Permits are for.
The Last Range Created lists the last range of Permits created for easy reference.

Batch Permit - Permit Information
Select the Permit Type, Issue Date, and any other required information for creating a Permit. These fields are identical to those found in the main Permit module.

Batch Permit - Person Information
While it is not required, you can enter a Person to be attached to all of the generated Permits. Enter the Person name in the Name field and click on the magnifying glass icon to search. Local ID, Alternate IC, and Account ID will all be filled in when the Person is selected.
Click Process to generate the Permits.
To find previously generated batch Permits, either input the Prefix or Suffix and a number from a batch, or enter the generated Batch Number and click Find. Permits that have been searched for can have a Person added to them using the mini Person module below the Permit module.

Batch Permit Notification
Once the Permits have been created, you will receive a notification with the number of Permits created and a link to the Batch information.
Online Permit Printing
Note: Online Permit Sales are required for this and are an optional utility.
This Utility processes Permits that have been requested online and either emails the related letters out or prepares them for printing them based on how they have been requested.

Online Permit Printing
Each Permit type shows how many Email, Mail, and Pickup Permits are awaiting processing. Choose which Permit types to process, as well as the mailing type for each. Selecting one mailing type but not the others will only print the selected Permits. This allows, for example, Emailed and Mailed Permits to be sent and printed, while Pickup Permits are left unprinted until the Person comes to receive them.
Click Process to begin the process.

Online Permit Printing Notification
When the process is complete, you will receive a notification with a link to a file containing all of the generated letters.
Batch Online Permit Validation
Note: Online Permit Sales are required for this and are an optional utility.
Batch Online Permit Validation allows users to validate and approve or deny multiple requested Permits at one time.

Batch Online Permit Validation - Permit Settings
Select if the Permits will have a Prefix or Suffix on them, and enter the text to be used. Enter the Starting Number for the Permits. The Active Date is automatically set to the current date but can be changed.

Batch Online Permit Validation - Online Permit Requests Search
By default, all Permits awaiting Validation are listed in the Grid. This can be narrowed down by selecting the Permit Type and any other relevant search information and clicking Build Grid. The Permit Type listing only has Permits that are marked as requiring Validation.
![]()
Batch Online Permit Validation - Online Permit Requests Grid
Once it has been built, you can remove offers from the Grid by clicking the X to the left of the listing. This will only remove them from the Grid and will not Deny the Permit.
When the Grid contains only Permits you wish to approve, click the Accept button in the upper right corner.
To Deny multiple Permits, remove or Approve any Permits that are not going to be Denied. Then click Deny in the upper right corner.
After you Accept or Deny the Permits, you will be prompted to send letters to those who requested the Permits.

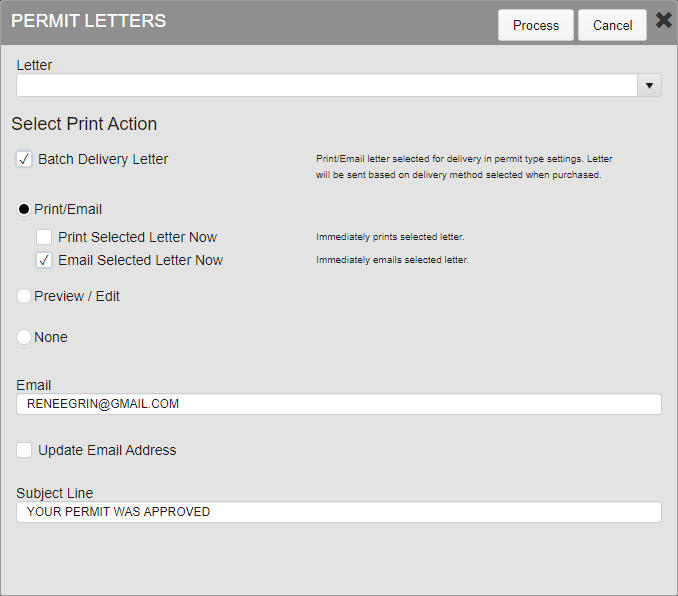
Letter Selection
Select the Letter to be sent if one is not all ready selected.
Check the Batch Delivery Letter box to add the Letter to the Batch listing for later printing. This option does not require a specific Letter to be chosen and will use the Delivery Letter set up in System Settings.
Alternatively, you can choose to Print/Email Selected Letter Now. This will immediately generate and process the Letter.
Preview/Edit shows a preview of the Letter and allows for editing before it is sent.
None takes no immediate action. If the Batch Delivery option is not selected, no Letter will be sent about the Permit at all.
Online Permit Validation
Note: Online Permit Sales are required for this and are an optional utility.
When Permits are purchased in the Web Portal they can be set up to be Validated prior to being issued.

Permits Awaiting Validation
Select a Permit request from the list or type in a name to find a specific record.
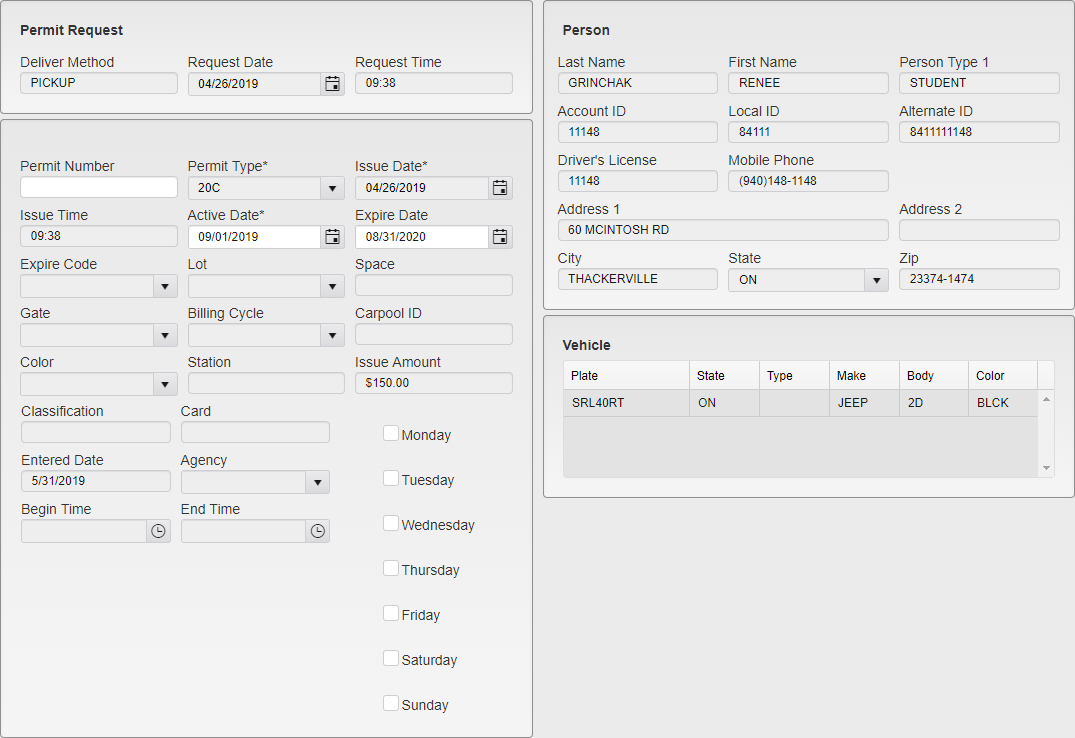
Permit Details
The Action menu can be used to send a letter if you need to communicate with a requestor before creating or denying the Permit.
Any attachments uploaded from the Web Portal can be viewed by clicking the attachments icon.
Type in the Permit Number, and the Active Date if needed. Click Accept or Deny.
Accept creates the permit with the payment.
Deny does not create a permit and the request will no longer appear on this list. If the payment was made via credit card it will need to be refunded.
After you Accept a Permit, you will be prompted to Print or Email a Letter to the Person.
Letter Selection
Select the Letter to be sent if one is not all ready selected.
Check the Batch Delivery Letter box to add the Letter to the Batch listing for later printing. This option does not require a specific Letter to be chosen and will use the Delivery Letter set up in System Settings.
Alternately, you can choose to Print or Email Selected Letter Now. This will immediately generate and process the Letter.
Preview/Edit shows a preview of the Letter and allows for editing before it is sent.
None takes no immediate action. If the Batch Delivery option is not selected, no Letter will be sent about the Permit at all.
If you wish to send the Permit notification to more than one Person, you can enter a comma and an additional e-mail address to the form.
![]()
Additional Email
Permit WaitList
Note: Permit WaitList is an optional utility.
The WaitList allows you to create a list of people waiting on specific Permits for future approval. These are Permits where the related Lot has filled up or the maximum number of that Permit have been sold. WaitList allows users to pre-emptively be listed for consideration if a Permit is returned.

WaitList Lots
Permit Lots that have WaitList enabled are shown on the Permit WaitList utility. Each listing shows the name of the Lot, the total available spaces and capacity, and the maximum number of people that can be on the WaitList, all of which are set in System Settings. The listing also shows the number of people currently on the WaitList, the number of available spaces in the Lot, and the number of pending Permit Offers. These numbers update based on the active Permits attached to the lot and the contents of the WaitList.
To open a WaitList, click on the pencil icon to the left of the listing.
![]()
WaitList Action Bar
The WaitList’s Action Bar has five buttons.
Save Configuration saves the configuration of the Template and Offer information in the upper box.
Send Offers will send Permit offers to all selected people on the WaitList.
Shake randomizes the order of the people on the WaitList.
Flush removes all entries on the WaitList.
The X icon closes the WaitList and returns you to the WaitList Lots page.

WaitList Options
The top of the WaitList shows the Lot and WaitList numbers again.
The Template to Send is the Template that will be used when an Offer is sent. Days to hold offer open is how long the Offer will be available for the Person to purchase. When the Offer expires, the Person can either be moved to the bottom of the list, or removed from the list entirely.
When a Lot has reached capacity, related Permits will no longer be shown for purchase on the Web Portal. If WaitList is on for those Permits, they will instead be listed in the WaitListed Permits section below the main Permit Selection box.

WaitListed Permits on Web Portal
Users can add themselves to the WaitList by clicking Add to List next to their desired Permit. They will not be charged for this and can remove themselves from the list by clicking Remove at any time.

WaitList - Add Person
Users can also be added to the WaitList from within TickeTrak by searching for them using the Name box and clicking the magnifying glass icon. Their Local and Account IDs will be filled in automatically when they are selected.
Enter their place on the list using List Order and select the Permit Type they are waiting on, then click the Add to WaitList button. They will be sent a Confirmation Letter, as selected in System Settings, when they are added.

WaitList - Listing
Regardless of how they were added, people currently on the WaitList are shown on the WaitList tab. The Name, Local ID, Person Type 1 and 2, and Address Type are pulled from their Person information. The Permit Type is the Permit they requested. The Last Offer Date is the last time the Person was sent an offer off of this WaitList.
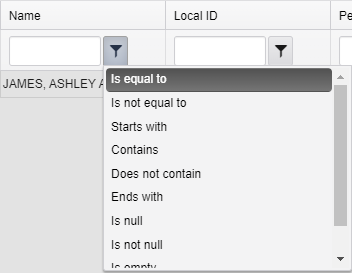
Filter Options
The list can be filtered using the funnel icons and the search boxes next to them. Type in the boxes to search for specific strings. Click on a funnel icon to choose how the search filter will be applied. Each column has its own filter and does not affect the others.
To select an entry to send an Offer, click the checkbox next to the entry. Multiple entries can be selected at the same time.
If you hold down the shift key on your keyboard and select two entries, all of the entries between them will also be selected. To select all of the entries, click the checkbox at the top of the listings.
To delete an entry, click the X icon next to it. Note that the Person will not receive any notification that they have been removed from the list.
To change the Permit being requested or change the position on the list, click the pencil icon.
Once an Offer has been made, the entry will be moved to the Pending Offers tab.

WaitList - Pending Offers
Offers can be rescinded by clicking the X icon next to the Offer. This removes the Person from the WaitList entirely and cannot be undone. The Person will not be notified that their Offer was removed.
An Offer time frame may be extended if the Person is at the maximum number of Permits. This is an automatic feature set up in System Settings. The Offer Expire date in the Pending Offers tab will update to reflect this change if it is applied.

Offered Permit on Web Portal
When an Offer has been made to a Person, they will see the Offered Permit listed in Permit Selection when they log into their account. They will then be able to purchase the Permit with the same as they would any other.
Was this article helpful?
That’s Great!
Thank you for your feedback
Sorry! We couldn't be helpful
Thank you for your feedback
Feedback sent
We appreciate your effort and will try to fix the article